This guide walks you through building a Museum Management System using C# from the ground up, a desktop application for managing exhibits, visitors, and ticket sales, complete with source code. Instead of only downloading it, you will understand how each part works: the database design, how C# connects to the database, how exhibits and tickets are managed, and how the Windows Forms interface ties it together. That understanding is what turns a downloaded project into something you can explain in a viva, extend for an assignment, or showcase in your portfolio.
Jump to download & setup
- What a museum management system does
- The technology: C#, Windows Forms, and SQL Server
- The database schema (exhibits, visitors, tickets)
- How C# connects to the database (ADO.NET)
- How exhibit and ticket management work
- The login and the main dashboard
- Setup: running it in Visual Studio
- How to extend it for your own project
1. What a museum management system does
A museum management system is software a museum uses to run its operations: cataloguing its exhibits, recording visitors, and selling tickets. It replaces paper registers and manual ticketing with a searchable, reliable application. Building one in C# is a popular project because it brings together every core skill of desktop application development, database design, connecting code to a database, CRUD operations, and building a user interface, in a realistic, professional context that is a little more interesting than the usual store or school example.
The version in this guide is a C# desktop application that includes exhibit management, visitor records, ticket sales, a secure login, and a main dashboard. That is enough to be a complete, demonstrable project while staying clear enough to fully understand.
2. The technology: C#, Windows Forms, and SQL Server
Most C# museum projects are built as a Windows Forms application in Visual Studio, with the data stored in a SQL Server (or SQL Server Express) database. Windows Forms gives you the visual screens, the windows, buttons, text boxes, and grids you interact with. C# is the language behind those screens that runs when you click a button. SQL Server holds the actual data in tables. The bridge between the C# code and the database is a technology called ADO.NET, which lets your code send SQL queries and read the results.
3. The database schema
The schema is the backbone of the project, so it is the best place to start. The museum system uses three core tables in SQL Server.
| Table | What it stores | Key columns |
|---|---|---|
Exhibits | Each item or display in the museum | ExhibitId, Name, Category, Description, Year |
Visitors | People who visit | VisitorId, Name, Phone, VisitDate |
Tickets | A ticket sold to a visitor | TicketId, VisitorId, TicketType, Price, PurchaseDate |
The relationships are the key idea. A visitor can buy one or more tickets, and the Tickets table links each ticket to the visitor who bought it through the VisitorId foreign key. Exhibits stand on their own as the museum’s catalogue. Understanding this single diagram is understanding most of the project, because every screen reads or writes one of these three tables.
4. How C# connects to the database (ADO.NET)
This is the concept at the centre of any C# database project, and the one examiners most often ask about. Your C# code talks to SQL Server through a connection string (which says where the database is) and commands that carry SQL. A typical insert from a form looks like this:
// add an exhibit using ADO.NET (simplified)
using (SqlConnection con = new SqlConnection(connectionString))
{
  con.Open();
  string sql = "INSERT INTO Exhibits (Name, Category, Description, Year) " +
               "VALUES (@name, @category, @desc, @year)";
  SqlCommand cmd = new SqlCommand(sql, con);
  cmd.Parameters.AddWithValue("@name", txtName.Text);
  cmd.Parameters.AddWithValue("@category", cmbCategory.Text);
  cmd.Parameters.AddWithValue("@desc", txtDescription.Text);
  cmd.Parameters.AddWithValue("@year", txtYear.Text);
  cmd.ExecuteNonQuery();
}
Two important habits show up here. The using block guarantees the connection is closed even if something goes wrong, which prevents leaked connections. And the parameters (@name, @category, and so on) instead of pasting text box values straight into the SQL string are how you prevent SQL injection, the same security principle that applies in every language. Being able to explain both is what separates a project you understand from one you merely ran.
5. How exhibit and ticket management work
Exhibit and visitor management are CRUD: add, view, edit, delete, each one a button on a form that runs a SQL command through ADO.NET like the one above. Viewing records loads them into a grid (a DataGridView) using a SELECT. Selling a ticket is where the tables come together: the form records the visitor, the ticket type, and the price, then inserts a row into the Tickets table linked to that visitor.
To show ticket sales in a readable way, with the visitor’s name rather than just an ID, the query uses a JOIN:
// list tickets with the visitor's name
SELECT t.TicketId, v.Name AS Visitor,
       t.TicketType, t.Price, t.PurchaseDate
FROM Tickets t
JOIN Visitors v ON t.VisitorId = v.VisitorId
ORDER BY t.PurchaseDate DESC
The JOIN is how separate tables become a single meaningful view. If you understand why this query joins tickets to visitors, you understand how relational data is turned back into readable information, which is a core idea worth being able to explain. Reporting, such as total ticket revenue, is then a SELECT with a SUM over the tickets table.
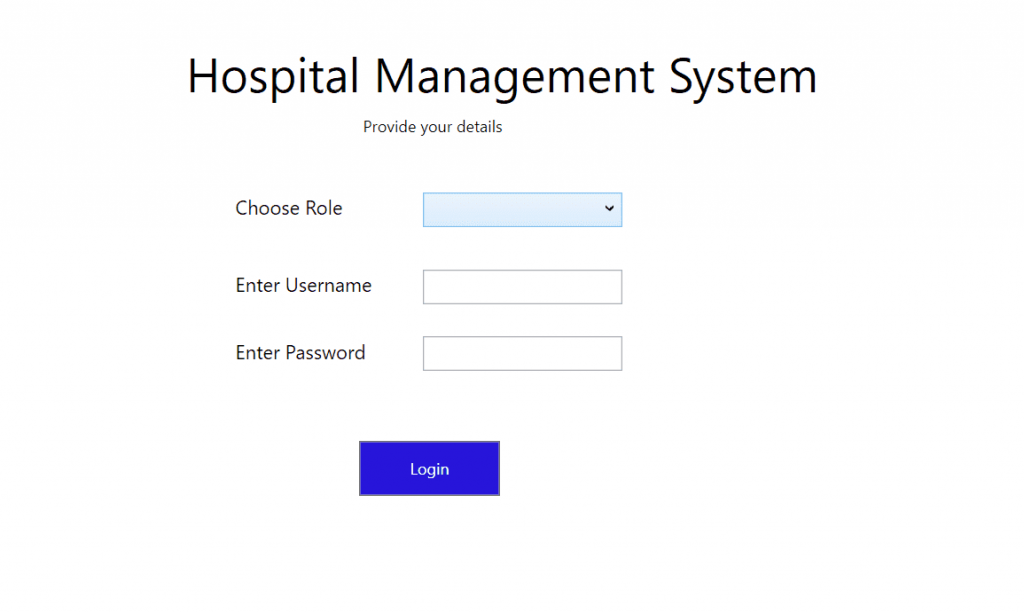
6. The login and the main dashboard
The application opens with a login form that checks a username and password against a staff record before letting the user in. On success it opens the main dashboard form, which has menu buttons leading to the exhibit, visitor, and ticket screens, plus summary figures like total exhibits, today’s visitors, and ticket revenue, each a small query against the tables you now understand. Because you know the schema, you can add any new dashboard figure yourself just by writing its query.
7. Setup: running it in Visual Studio
To run this C# project you need Visual Studio and SQL Server (the free Express edition works). The steps are:
- Install Visual Studio with the .NET desktop development workload, and SQL Server Express.
- Open the project’s
.slnsolution file in Visual Studio. - Restore the database by running the included
.sqlscript, or attach the included database file, in SQL Server. - Update the connection string in the project to match your SQL Server instance name.
- Press F5 to build and run, then log in with the default credentials in the guide.
The complete museum management system in C# with the Visual Studio project and database is ready to download and run by following the steps above.
Download source code
Replace this link with your actual download URL.
8. How to extend it for your own project
Assignments and portfolios reward what you add, not what you copied. Because you now understand the schema and how C# talks to the database, here are natural extensions you can build and explain:
- Exhibit categories and search: let staff filter exhibits by category or search by name.
- Ticket types and pricing tiers: store different ticket prices (adult, child, student) and pick one at sale.
- Daily sales report: a view of tickets sold and revenue for a chosen date, using a
WHEREon the date. - Exhibit loans or maintenance status: track whether an exhibit is on display, in storage, or being restored.
- Printable tickets and receipts: generate a printable ticket after a sale.
Each is a small, well-scoped addition that demonstrates real understanding, exactly what turns a standard download into a project you can defend and be proud of.
Frequently asked questions
What is a museum management system in C#?
It is a desktop application that manages a museum’s exhibits, visitors, and ticket sales, built with C# and Windows Forms and backed by a SQL Server database. It is a popular student project because it covers database design, connecting code to a database with ADO.NET, CRUD, and building a user interface.
What database and tools does it use?
It is typically built in Visual Studio as a Windows Forms application using C#, with data stored in SQL Server (the free Express edition is fine). The C# code connects to the database using ADO.NET.
How does C# connect to the database?
Through ADO.NET. The code uses a connection string to reach SQL Server and SqlCommand objects to send SQL queries with parameters, then reads the results. Using parameters rather than pasting values into the SQL prevents SQL injection.
Can I use this as my college or university project?
Yes. It is well suited as an academic project, and because this guide explains the database design, the ADO.NET connection, and the ticket sales, you can confidently answer questions in a viva. Adding one of the suggested extensions makes it stronger still.
Is the source code free to download?
Yes, the full museum management system source code is available to download for free using the link in the download section above.
Museum management system objective is to generate daily and weekly visitors report based on their entry time, out time and total duration, keep record. This program is developed using C#, ASP.NET and MYSQL Database in Visual Studio 2017. Currently most of the museum uses manual system which is not great in UI design or better system performance. For changes, a digitalized system is required. After the success of museum management system people are looking for it because of its makes the visitors record keeping easy and fast simple by generating weekly and daily report, generating charts and also it help in analyse their business.
This software can be used in museum. Its objective is to generate daily and weekly visitors report based on their entry time, out time and total duration, keep record according to the visitors. The visitors details and their entry details can be recorded , saved and can be retrieved in a file. The file can also be exported as a CSV file and we can also import the CSV files. Chart is also generated to show the data statistics. The system is fully simple, easy system to use having good design and better system performance.
User Manual
Operating the system
1.As you open the Annapurna Museum Management system, the program will prompt for username and password. After providing correct username and password user will get access to the program and will be redirected to the home screen. If the password and username is incorrect system will give a message indicating the user that the credentials are wrong.

Note: username: admin
password: admin
2. After successful login, the user is prompted to home page.
3. The home page features all the available functions of the software. The below are the functions of the program described in brief:
Visitor: This button contains the sub-menu listed below:
- Add Visitor
- Import from CSV
- Export from CSV
- Save(serialization)
- Retrieve (Deserialization)
Visit Entry: This button contains the below sub-menus:
- Add Visit
- Import from CSV
- Export from CSV
- Save(serialization)
- Retrieve (Deserialization)
- Sort By Total Duration
Reports: This button works to show the Daily and Weekly Report of the Visitors.
Chart: On clicking this button, a new chart is generated based on the number of visitors.
Sign Out: This button Signs out the user and redirects them to the Login Screen
Exit: This button closes the program.
4. To add a new visitor, the user can to click on the visitor button. After clicking the button, the user is presented with a form where all the functions are listed.
Upon clicking ‘Add Visitor’ it opens a form which includes visitor name, email, address, contact and occupation.
- Name: The visitor name is entered in this field by the system user.
- Email: Email of the visitor is entered in the field.
- Address: The user enters the visitors address in the address field.
- Contact: Contact number of the visitor is the input of this field.
- Occupation: The occupation of the visitor is entered by the system user here.
- Add: Upon clicking the add button, the form is submitted and the visitor is registered in the system.
- Go Back: Upon clicking cancel the form is closed.
b. Import from CSV: This menu item is be used to open a previously saved visitor details from a CSV file.
c. Export to CSV: This menu item is be used to save and export the visitor details to a CSV file.
d. Save(Serialization): This menu item is used to save the visitor details into a .dat file.
e. Retrieve(Deserialization): This menu item is used to retrieve the visitor details from a .dat file.
5.The user can also register the visit details of the visitor.After the visitor is registered, the user can add the visit details of the visitor by clicking on “Visit Entry” from the home screen. The user is presented with different features related to visit details.
6. After the system user finishes the visit details tasks, they can generate report by clicking on the Report Item. The report is classified in two types: Daily and Weekly Report.
7. The system user can view the chart by clicking the Chart menu item in the menu page. The system will generate the chart of visitors on a certain week with total number of visitors and total time spent in minutes.
Annapurna Museum Management system is protected by a login system. Running the program will open the login screen. After the user enter the correct login credentials, the system will open the home screen, The main screen contains menu items along with sub menu. The menu item includes Visitor, Visit Entry, Reports, Charts, SignOut and Exit. The sub menu item is the Report item which includes the Weekly report and Daily report. After using the system and completing all the necessary task, user can close the system by clicking the Exit button on home screen.
Installation Steps:
– Download and extract the .zip file.
– Open the folder from visual studio.
FIND MORE on this site.
DOWNLOAD Museum Management System In C# With Source Code FOR FREE