This guide walks you through building a Clinic Management System using C# from the ground up, a desktop application for managing patients, doctors, and appointments, complete with source code. Instead of only downloading it, you will understand how each part works: the database design, how the C# code connects to the database, how patient and appointment records are managed, and how the Windows Forms interface ties it together. That understanding is what turns a downloaded project into something you can explain in a viva, extend for an assignment, or showcase in your portfolio.
Jump to download & setup
- What a clinic management system does
- The technology: C#, Windows Forms, and SQL Server
- The database schema (patients, doctors, appointments)
- How C# connects to the database (ADO.NET)
- How patient and appointment management work
- The login and the main dashboard
- Setup: running it in Visual Studio
- How to extend it for your own project
1. What a clinic management system does
A clinic management system is software a clinic uses to run its daily operations: registering patients, keeping doctor records, scheduling appointments between patients and doctors, and storing visit details. It replaces paper registers with a searchable, reliable application. Building one in C# is a popular project because it brings together every core skill of desktop application development, database design, connecting code to a database, CRUD operations, and building a user interface, in a realistic, professional context.
The version in this guide is a C# desktop application that includes patient management, doctor management, appointment scheduling, a secure login, and a main dashboard. That is enough to be a complete, demonstrable project while staying clear enough to fully understand.
2. The technology: C#, Windows Forms, and SQL Server
Most C# clinic projects are built as a Windows Forms application in Visual Studio, with the data stored in a SQL Server (or SQL Server Express) database. Windows Forms gives you the visual screens, the windows, buttons, text boxes, and grids you interact with. C# is the language behind those screens that runs when you click a button. SQL Server holds the actual data in tables. The bridge between the C# code and the database is a technology called ADO.NET, which lets your code send SQL queries and read the results.
3. The database schema
The schema is the backbone of the project, so it is the best place to start. The clinic system uses three core tables in SQL Server.
| Table | What it stores | Key columns |
|---|---|---|
Patients | Each registered patient | PatientId, Name, Age, Gender, Phone, Address |
Doctors | Each doctor at the clinic | DoctorId, Name, Specialization, Phone |
Appointments | A scheduled visit | AppointmentId, PatientId, DoctorId, AppointmentDate, Status |
The relationships are the key idea. A patient can have many appointments and a doctor can have many appointments, and the Appointments table links a patient to a doctor for a specific date. The PatientId and DoctorId columns in the appointments table are foreign keys connecting back to the other two tables. Understanding this single diagram is understanding most of the project, because every screen reads or writes one of these three tables.
4. How C# connects to the database (ADO.NET)
This is the concept at the centre of any C# database project, and the one examiners most often ask about. Your C# code talks to SQL Server through a connection string (which says where the database is) and commands that carry SQL. A typical insert from a form looks like this:
// add a patient using ADO.NET (simplified)
using (SqlConnection con = new SqlConnection(connectionString))
{
  con.Open();
  string sql = "INSERT INTO Patients (Name, Age, Gender, Phone, Address) " +
               "VALUES (@name, @age, @gender, @phone, @address)";
  SqlCommand cmd = new SqlCommand(sql, con);
  cmd.Parameters.AddWithValue("@name", txtName.Text);
  cmd.Parameters.AddWithValue("@age", txtAge.Text);
  cmd.Parameters.AddWithValue("@gender", cmbGender.Text);
  cmd.Parameters.AddWithValue("@phone", txtPhone.Text);
  cmd.Parameters.AddWithValue("@address", txtAddress.Text);
  cmd.ExecuteNonQuery();
}
Two important habits show up here. The using block guarantees the connection is closed even if something goes wrong, which prevents leaked connections. And the parameters (@name, @age, and so on) instead of pasting text box values straight into the SQL string are how you prevent SQL injection, the same security principle that applies in every language. Being able to explain both is what separates a project you understand from one you merely ran.
5. How patient and appointment management work
Patient and doctor management are CRUD: add, view, edit, delete, each one a button on a form that runs a SQL command through ADO.NET like the one above. Viewing records loads them into a grid (a DataGridView) using a SELECT. Scheduling an appointment is where the tables come together: the form lets the user pick a patient and a doctor and a date, then inserts a row into the Appointments table linking the two by their IDs.
To show appointments in a readable way, with patient and doctor names rather than just ID numbers, the query uses a JOIN across the three tables:
// list appointments with patient and doctor names
SELECT a.AppointmentId, p.Name AS Patient,
       d.Name AS Doctor, a.AppointmentDate, a.Status
FROM Appointments a
JOIN Patients p ON a.PatientId = p.PatientId
JOIN Doctors d ON a.DoctorId = d.DoctorId
ORDER BY a.AppointmentDate
The JOIN is how separate tables become a single meaningful view. If you understand why this query needs two joins, one to reach the patient and one to reach the doctor, you understand how relational data is turned back into readable information, which is a core idea worth being able to explain.
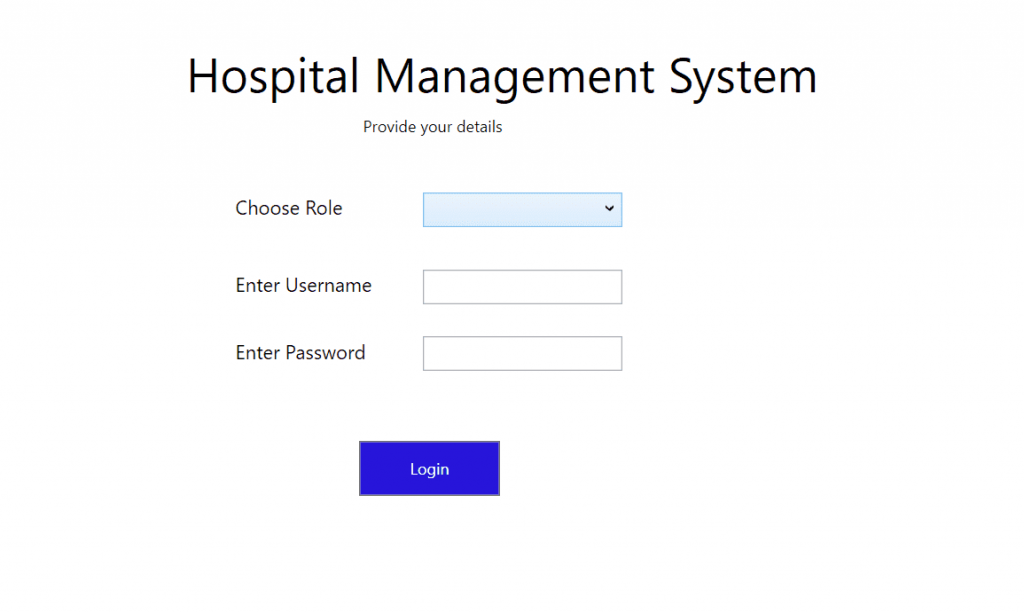
6. The login and the main dashboard
The application opens with a login form that checks a username and password against an admin or staff record before letting the user in. On success it opens the main dashboard form, which has menu buttons leading to the patient, doctor, and appointment screens, plus summary figures like total patients and today’s appointments, each a small query against the tables you now understand. Because you know the schema, you can add any new dashboard figure yourself just by writing its query.
7. Setup: running it in Visual Studio
To run this C# project you need Visual Studio and SQL Server (the free Express edition works). The steps are:
- Install Visual Studio with the .NET desktop development workload, and SQL Server Express.
- Open the project’s
.slnsolution file in Visual Studio. - Restore the database by running the included
.sqlscript, or attach the included database file, in SQL Server. - Update the connection string in the project to match your SQL Server instance name.
- Press F5 to build and run, then log in with the default credentials in the guide.
The complete clinic management system in C# with the Visual Studio project and database is ready to download and run by following the steps above.
Download source code
Replace this link with your actual download URL.
8. How to extend it for your own project
Assignments and portfolios reward what you add, not what you copied. Because you now understand the schema and how C# talks to the database, here are natural extensions you can build and explain:
- Prescriptions: add a prescriptions table linked to appointments to record medicines for each visit.
- Billing: generate a bill per appointment and track payments.
- Search and filters: let staff search patients by name or filter appointments by date or doctor.
- Reports and printing: add a report view, such as appointments for a given day, that can be printed.
- Appointment conflict check: prevent booking a doctor for two appointments at the same time.
Each is a small, well-scoped addition that demonstrates real understanding, exactly what turns a standard download into a project you can defend and be proud of.
Frequently asked questions
What is a clinic management system in C#?
It is a desktop application that manages patients, doctors, and appointments for a clinic, built with C# and Windows Forms and backed by a SQL Server database. It is a popular student project because it covers database design, connecting code to a database with ADO.NET, CRUD, and building a user interface.
What database and tools does it use?
It is typically built in Visual Studio as a Windows Forms application using C#, with data stored in SQL Server (the free Express edition is fine). The C# code connects to the database using ADO.NET.
How does C# connect to the database?
Through ADO.NET. The code uses a connection string to reach SQL Server and SqlCommand objects to send SQL queries with parameters, then reads the results. Using parameters rather than pasting values into the SQL prevents SQL injection.
Can I use this as my college or university project?
Yes. It is well suited as an academic project, and because this guide explains the database design, the ADO.NET connection, and the appointment scheduling, you can confidently answer questions in a viva. Adding one of the suggested extensions makes it stronger still.
Is the source code free to download?
Yes, the full clinic management system source code is available to download for free using the link in the download section above.
A fully featured Clinic Management System built using ASP.NET, C#, and SQL Server, designed with a robust three-tier architecture for scalability, maintainability, and performance. This project has been developed by contributor Haris Muneer and is ideal for hospitals, clinics, and healthcare facilities seeking a digital patient and doctor management solution.
With seamless integration between frontend, backend, and database layers, this ASP.NET clinic management software ensures smooth workflow automation, secure patient data handling, and improved efficiency for medical staff.
Technologies Used
The Clinic Management System is built using industry-standard technologies to ensure high performance and secure healthcare data management:
- Frontend: HTML, CSS, Bootstrap, JavaScript
- Backend: C#, ASP.NET Framework
- Database: Microsoft SQL Server (Express Edition compatible)
Pre-requisites:
- Microsoft Visual Studio (recommended latest version)
- Microsoft SQL Server Express
- Microsoft SQL Server Management Studio (SSMS)
Core Features of the Clinic Management System
This medical management software is divided into three main modules — Patient, Doctor, and Administrator. Each module has dedicated features to streamline clinic operations.
1. Patient Module
The patient interface is designed for ease of use, allowing patients to manage their healthcare journey online.
- Patient Home: View personal profile, medical details, and clinic updates.
- Current Appointment: Track pending or approved appointments with doctors.
- Bills History: Access all past billing records for completed appointments.
- Treatment History: Review diagnosis, prescriptions, and progress for past treatments.
- Take Appointment:
- Select a department (e.g., Cardiology, Orthopedics, Pediatrics).
- View available doctors in that department.
- Check doctor profiles, qualifications, and experience.
- Choose a free time slot and send an appointment request.
- Get notified once the doctor accepts or rejects the request.
- Notifications: Real-time updates on appointment status.
- Feedback System: Rate your experience from 1–5 stars after each completed appointment.
- Appointment Limitation: Patients can request only one active appointment at a time.
2. Doctor Module
The doctor interface empowers healthcare professionals to manage patient care efficiently.
- Doctor Profile: View and update professional details.
- Pending Appointments: See all new appointment requests.
- Today’s Appointments: Manage the current day’s schedule with accept/reject options.
- History Update: Record diagnoses, prescriptions, and treatment progress.
- Generate Bill: Automatically calculate patient charges after consultations.
- Patient History Access: Review past treatments of all assigned patients.
3. Administrator Module
The administrator panel offers full control over clinic operations.
- Admin Home Dashboard:
- View clinic statistics (weekly appointments, income reports).
- See the total number of registered patients and doctors.
- Monitor departments and staffing levels.
- View Doctors: List all registered doctors with department details and profiles.
- View Patients: Access all patient profiles, contact details, and medical IDs.
- View Other Staff: Manage non-doctor clinic staff and their roles.
- Search Box: Quickly locate specific employees.
- Add/Remove Functionality: Register or remove doctors, patients, and staff members.
Why This Clinic Management System Stands Out
This project is not just a basic patient-doctor tracker — it is a complete healthcare software solution that can be adapted for real-world use.
- Three-tier architecture ensures separation of concerns, making the codebase easy to maintain and scale.
- Built with ASP.NET and SQL Server, ensuring enterprise-grade performance and security.
- Fully responsive design so it works on desktops, tablets, and smartphones.
High-Value Keywords Integrated:
clinic management system in asp.net, c# hospital management system, sql server medical database, appointment scheduling software, patient record management system, healthcare management software, hospital billing software in asp.net, medical software project with source code.
How to Run the Project
Step 1 – Install Required Tools
Ensure the following are installed on your system:
- Microsoft Visual Studio (latest version recommended for better ASP.NET support)
- Microsoft SQL Server Express Edition
- Microsoft SQL Server Management Studio (SSMS)
Step 2 – Configure the Database
- Open SSMS.
- In the “Connect to Database Engine” window:
- Server Name: .\SQLEXPRESS
- Authentication: Windows Authentication
- Execute Schema.sql from the Database Files folder to create database tables.
- Run the following SQL scripts to configure module-specific data:
- Admin.sql
- Doctor.sql
- Patient.sql
- Signup.sql
- Execute Insertions.sql to insert test data, including login credentials for admin, doctors, and patients.
Step 3 – Run the Project
- Open Clinic Management System.sln in Visual Studio.
- Set SignUp.aspx as the startup page.
- Click Run (IIS Express).
- Log in using the provided credentials from the test data to explore features.
Real-World Applications
- Private clinics and hospitals wanting a low-cost digital solution.
- Medical institutions looking to train students in healthcare IT systems.
- Developers aiming to learn ASP.NET with SQL Server in a practical context.
Conclusion
This ASP.NET C# Clinic Management System is a complete, ready-to-use solution that not only improves patient care but also automates tedious administrative work. With secure SQL Server backend and a clean Bootstrap-based UI, it delivers a modern healthcare experience.
Whether you are a developer, a medical IT administrator, or a student, this project gives you a hands-on example of how to design, develop, and deploy a real-world healthcare management application.
f you need to download Microsoft Visual Studio(recommended) on your PC, follow this video:
FIND MORE on this site.
DOWNLOAD Clinic Management System using C# With Source Code FOR FREE